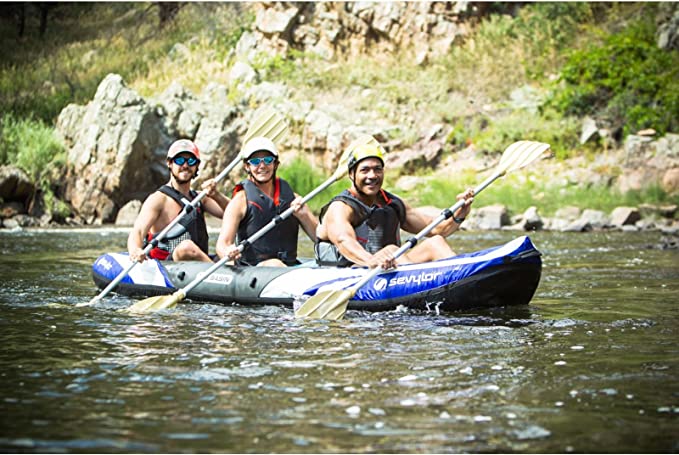
Whenever I have a vacation or spare time I love to have a kayak tour with my friends and family. Exploring new places in combination with water and mountain is always fun for me.
On this journey, I always prefer to move comfortably without the burden of gear and accessories. My friends and family also agree with me on this matter.
In my journey of kayaking, I tried different types of kayaks. From those, I found inflatable kayaks most convenient for my journey.
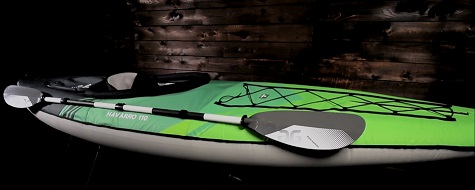
In this article, I will share with you guys how I felt after Aquaglide Navarro 110 Review.
Navarro 110 is one of the most popular recreational touring kayaks in the market nowadays due to its cool features and unique designs as they suggested.
So let’s go further and explore what I found as good side and what was bad.
Table of Contents
Brief description of Navarro 110 kayak
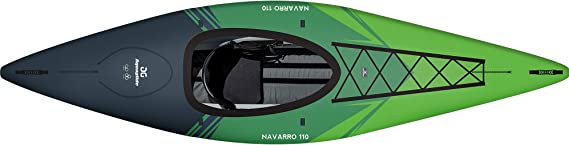
Navarro 110 kayak is one of the most beautiful inflatable kayaks on the market today. Its beautiful design with nice color makes the kayaker fall in love with it.
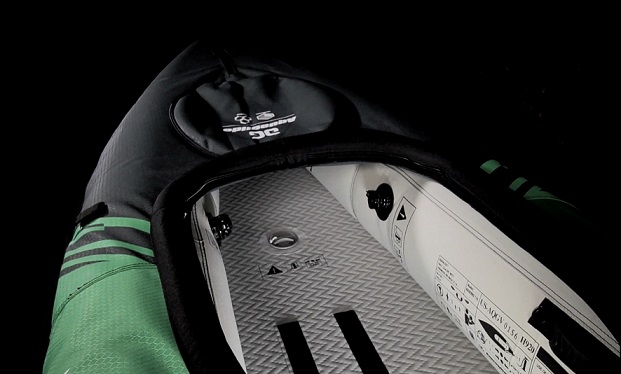
Modern construction with smart features helps this kayak rank faster among other inflatable kayaks. Its industry-leading drop-stitched floors, durable construction material, and zip lock storage system made this kayak unique.
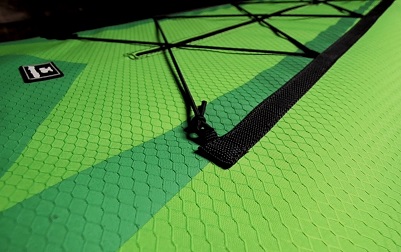
Other features like quick release fin, adjustable footrest system, drain plug, molded handle, and other accessory straps help the kayaker to have an ultimate tour on the water. An adjustable foamy seat is also included which is better than an inflatable seat.
Specifications | Particulars |
|---|---|
Width | 34 inches |
Height | 14 inches |
Length | 11’ 4” inches |
Material | polyester |
Weight | 28 lbs |
Capacity | 250 lbs/ 1 person |
Warranty | 1 year |
Not included | Pump, paddle, PFD |
Best for | Recreational touring |
Aquaglide Navarro 110 Review on features
Weight
It is comparatively very easy to carry and get into the water without any hard work since it is only 28 lbs. The average weight of recreational kayak is about 36 lbs if it is single kayak whereas tandem kayak is between 60 to 65 lbs. So Navarro 110 is much easier to carry than any regular kayak.
Cockpit space
Cockpit is slightly smaller than other similar type kayak. But once you get inside the cockpit it will fit well and you will feel comfortable. But if you are taller then you may feel tightness inside the cockpit.
Inflation process
Normally, it takes 10 to 15 minutes to inflate the kayak. Two side Boston valves were very good at pumping process while Halkey-Roberts for floor should improve for pumping action. For proper inflation, follow the inflation order listed on the valves. Follow their video instruction for this process.
Floor
one of the best features that I love of this kayak is its drop stitch floor. Once you inflate the floor, it become as solid as rock and make this kayak more stable. One can stand up on this kayak easily which may not be possible if it was I-beam floor like most other inflatable kayak. Many kayakers like me purchase this kayak due its drop stitch floor.
Seat
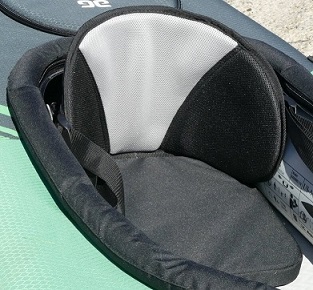
Most of the inflatable kayak comes up with inflatable seat which may not comfortable to many kayakers for long time use. But Navarro 110 comes up with real cushion for the seat. This cushion seat makes me feel good for long time paddling.
Construction Material
Navarro 110 is made from polyester. The bottom of this kayak become solid when it is inflated. It is a PVC like material. Top covering fabric is 600D hex ripstop polyester which is a high quality material and prevent the kayak from scratch and puncture efficiently. After kayaking many times in rocky river I found this kayak without any puncture which satisfied me about the material durability.
Aquaglide Navarro 110 Review on performance
Tracking
Truly speaking tracking is not up to the mark. With the fin attached, it tracks a little bit better. Since it is a recreational kayak one should not worry about this tracking issue. For touring we should not be concerned about how efficiently it tracks. Rather we should think about how we are enjoying nature while investing comparatively less amount than a solid kayak.
Speed
If I compare this kayak with other kayaks like Intex Explorer K2 kayak in terms of speed then this kayak will be a winner. I can say that its speed is better than most other inflatable kayaks.
If you compare it with a regular solid kayak then it may not be a winner. Since solid kayak is made hydrodynamically to obtain good speed and better performance that is why they are costlier than an inflatable kayak.
Comfort
Most of the inflatable kayaks come up with an inflatable seat which is not that great for long-time paddling and there is a risk of puncture. But Navarro 110 has a very comfortable seat which is foamy solid in construction. That is why the seat will help you to paddle a long time.
The cockpit area felt congested. Not that much roomy for a big guy. But if you are not that much tall or if you are less than 5 feet 10 inches you can comfortably fit into the cockpit.
For tall folks, it is possible to paddle but not for a long time on the water. They have to take a break every one and a half hours to two hours. The footrest was good enough to adjust my leg and can hold the pressure of my legs.
Is Aquaglide Navarro 110 A Recreational or touring kayak?
The length of the touring kayak ranges from between 12 to 20 feet whereas the width is between 18 to 24 inches. If I consider this kayak as a touring kayak, then this kayak has a width of 34 inches which means the Navarro 110 is more stable than any other touring kayak because a wider kayak is more stable than a narrower kayak. While at the same time narrower kayaks can gain a good speed. In this case, Navarro 110 is much slower than any other touring kayak.
If you think about the length and width of a recreational kayak then it will be around 12 feet or below in length and 28 to 36 inches in width. So Navarro 110 is a recreational kayak actually since its width and length fall in the range of a recreational kayak.
So the bottom line is that the Aquaglide Navarro 110 is perfectly recreational kayak. Also you can use this kayak for touring but you have to trade off some performance!
Overall Review Score
Best setup process found during Aquaglide Navarro 110 review
Set up is very easy. It is divided into three very simple steps – Unpack > Unfold > Inflate. First of all, unpack the kayak carefully. If you use a knife to cut the tape of the packaging be careful about the inside items. A single pinch can lead your kayak to damage.
Unfold is not a topic to discuss here largely. Everyone knows it. But for a note before pumping the kayak, clearly unfold the kayak all over. Look for any crooked portions, if any make it normal before pumping.
Inflation
To inflate the kayak, follow the instruction manual. There is an order to follow during the inflation process. Numbering is marked on the valves.
First, start with the number one valve which is the side chamber. Two side chambers are incorporated with two Boston valves.
The manual instructed to inflate the side chamber to 2 PSI. If you use a manual hand pump you may need about 50 strokes to inflate one side chamber.
Do not inflate one side chamber to full capacity at a time. First, inflate both side chambers to 70 to 80 % of their capacity. Then start again one by one to its full pressure. This will help your kayak to be stable more on the water.
Floor pumping
As per the provided manual, it says to inflate the floor up to 6 PSI. The Halkey-Roberts valve for the floor is not the one I like. It requires an adapter that does not come with most standard pumps.
So we had to manage one. You can get the Halkey-Roberts adapter from amazon or any other supplier. Close the valve and attach the pump and start pumping up to 6 PSI. You may need 40 to 45 strokes to fully inflate the floor.
After inflation, look at the bottom of the kayak for its flatness and straightness.
If you found any dissimilarity remove some air and look again. In this process, you need to remove or add some air until it looks straight. It is important for getting proper stability and performance from the kayak.
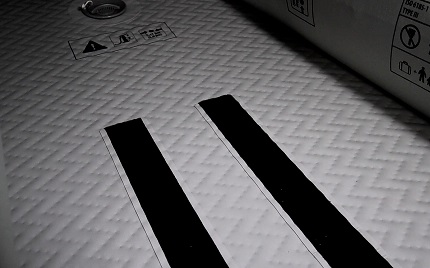
Attach the seat and footrest
Since it is not an inflatable seat just put the seat on the Velcro strips. Then adjust the seat using straps through d-rings.
Instruction for footrest is not mentioned in the manual. Here I am telling you how I did it! Place the feet brace on the Velcro strips and make sure that your leg is slightly bent when you press against it. You can easily adjust it as required.
Inflate the coaming tube
The coaming tube will help you to stay dry from the splash of water around the cockpit. Many beginners do not inflate this tube due to not knowing about it.
It has a twist-lock valve. To open the valve, twist the end of the lock. Using a hand pump it could be difficult to pump since the pump does not fit well to the valve. In this case, you may need help to hold the valve over the twist lock. Another way you can do it. Blow the tube up with your mouth.
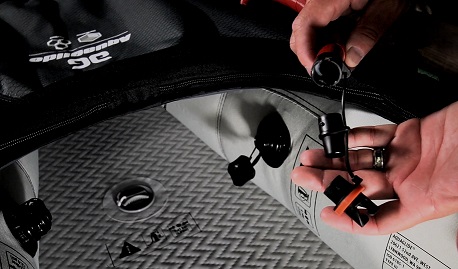
Attach the fin
The fin of this kayak is designed to give you straight tracking and a secured lock in position. Insert the fin into the slot and look for the alignment of the hole between the fin and mounting. Then insert the quick release pin through the hole and pull the fin to ensure is it secure or not.
Final check before launching
Check for any hissing sound. If any, then your kayak may have a leakage. If not then congratulation! You are ready to hit the water.
Also double-check everything and look at the all zippers are closed or not. Make sure that the drain plug is firmly closed. All the setup processes will take you 15 minutes for the first time launching. Subsequent setup time will be near about 10 minutes.
Our final words
Generally most of the touring or recreational kayaks are ranges from a thousand dollars. Some of them as high as two to three thousand dollars. In every season it may not be viable or cost effective to buy a new kayak under such a high price.
So from the cost and portability point of view with some decent feature while keeping the Aquaglide Navarro 110 review in mind, its a nice kayak under comparatively low investment.
Every kayak has some issues. In the same way Navarro 110 has also some minor issues. But overall I enjoyed this kayak very much during my kayaking journey.