For many kayakers, especially beginners, paddling can be both exciting and tiring. That’s where kayak trolling motors come in — offering effortless movement through the water while keeping your hands free for fishing, photography, or simply enjoying the view. Whether you’re new to kayaking or upgrading your setup, understanding what makes a trolling motor ideal for your adventures can make all the difference.
Table of Contents
What is a Kayak Trolling Motor?
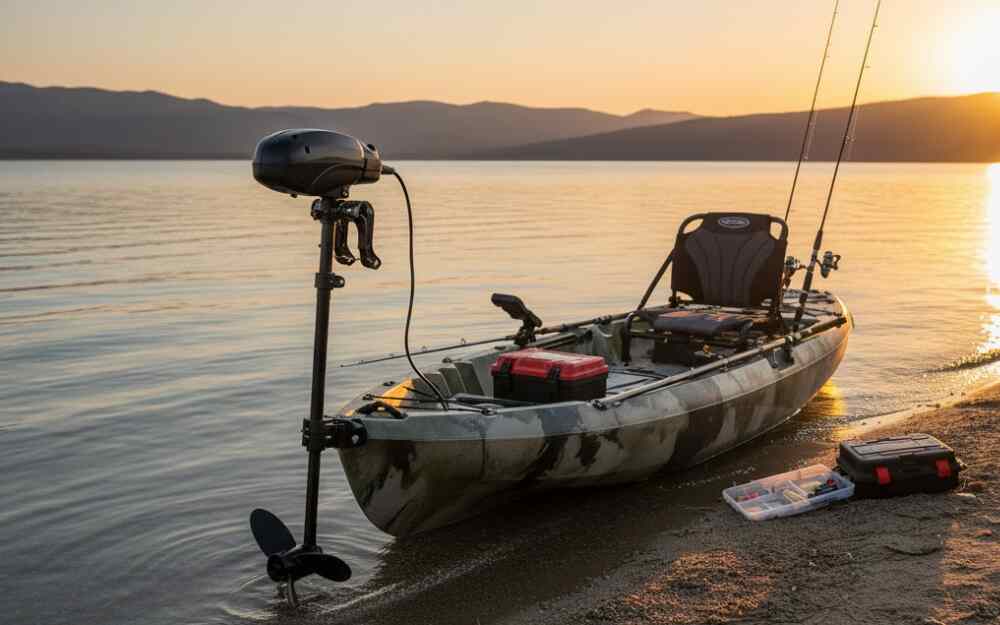
A trolling motor is a small, quiet electric motor used to propel your kayak without paddling. Unlike large gas-powered engines, trolling motors are lightweight and battery-operated — perfect for fishing trips or exploring calm lakes, rivers, or coastal areas. They help maintain steady speeds, maneuver easily in tight spots, and allow you to focus more on your experience rather than the effort of paddling.
Key Features to Look for in a Perfect Kayak Trolling Motor
When choosing the best trolling motor for your kayak, consider these essential features for a smooth, safe, and value-for-money experience:
1. Thrust Power
Thrust is the power that pushes your kayak through the water, measured in pounds (lbs).
For solo kayaks, a 30–40 lbs thrust motor is usually enough.
For tandem or loaded kayaks, go for 45–55 lbs thrust.
Choosing the right thrust ensures you get sufficient power without draining your battery too quickly.
2. Shaft Length
Shaft length decides how far the motor’s propeller stays underwater, which directly affects performance and efficiency.
Short shafts (24–30 inches) are ideal for kayaks.
The propeller should stay submerged about 6–8 inches below the water surface.
A properly sized shaft prevents drag and increases efficiency.
3. Power Source (Battery Type)
Most trolling motors run on 12V deep-cycle marine batteries. Look for:
Lithium-ion batteries for lightweight and long life.
AGM or lead-acid batteries if you want budget-friendly options.
Always check the motor’s amp draw and battery capacity to ensure you get at least 3–4 hours of continuous use.
4. Control Type
Trolling motors come with different control options:
Hand control: Mounted on the kayak’s side or rear; simple and affordable.
Foot control: Operated with pedals, leaving your hands free for fishing.
- Remote control: Offers maximum comfort and flexibility but costs more.
Choose based on your preferred style and comfort level.
5. Saltwater vs. Freshwater Compatibility
If you paddle in saltwater, choose a motor labeled saltwater-rated — it has corrosion-resistant materials like stainless steel or sealed aluminum.
Freshwater motors, on the other hand, are cheaper but not suitable for ocean use.
6. Noise and Vibration
A good trolling motor should operate quietly. Low noise levels prevent disturbing fish and ensure a peaceful ride — a key point for anglers.
7. Weight and Portability
The motor should be light enough to carry easily and not affect your kayak’s balance. Most kayak trolling motors weigh between 15–25 lbs, striking a balance between performance and portability.
Best Value-for-Money Considerations
To get the most out of your purchase:
Opt for reliable brands like Minn Kota, Newport Vessels, or Watersnake.
Check battery efficiency — long run-time per charge saves cost over time.
Choose durable materials like aluminum or reinforced composite for long-term use.
Avoid overspending on high-thrust motors if you only paddle calm waters.
A mid-range motor with 40 lbs thrust, variable speed control, and corrosion resistance usually offers the best value for recreational kayakers.
How to Mount and Use a Kayak Trolling Motor
Mounting a trolling motor correctly ensures safety and performance. Here’s a simple guide for beginners:
Step 1: Choose Your Mounting Position
You can mount your motor in three common positions:
Stern (rear mount): Most popular and easiest to control.
Bow (front mount): Offers better steering precision but requires more skill.
Side mount: Good option if your kayak doesn’t support stern installation.
Step 2: Install the Mounting Bracket
Use a trolling motor mount designed for kayaks. Some kayaks come with pre-drilled mounts, or you can buy a universal bracket. Make sure it’s secure and aligned straight.
Step 3: Attach the Motor
Slide the motor’s shaft into the bracket and tighten the clamps. Adjust the depth so the propeller stays 6–8 inches below the surface.
Step 4: Connect the Battery
Connect the motor’s power cable to your 12V battery using the provided terminals. Always use waterproof connectors and check polarity before turning it on.
Step 5: Test and Adjust
Power on the motor at low speed to test steering and thrust direction. Adjust alignment as needed for smooth control.
Pro Tips for Safe and Efficient Use
Always secure your battery in a waterproof box.
Charge fully before every trip.
Carry manual paddles as backup.
Rinse and dry the motor after saltwater use.
Use speed settings wisely to conserve battery life.
Final Thoughts
A kayak trolling motor can completely transform your kayaking experience — from tiring paddles to effortless cruising. By focusing on the right thrust power, shaft length, control system, and battery type, you can enjoy hours of adventure with great value for money. With proper installation and maintenance, even beginners can enjoy a professional-grade kayaking journey powered by a compact, efficient trolling motor.